Showing posts with label how-to. Show all posts

Thursday, April 14, 2016

Guest Post: Tips for Traveling to Spain

We asked our friend Pauley if he'd like to be a guest writer on our blog covering anything about our trip to Spain with him. He accepted the challenge. This is what he had to share:

Tips for Traveling to Spain
by Pauley


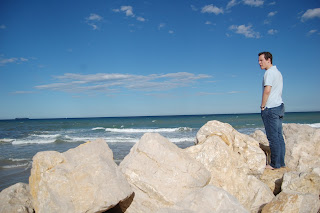
Pauley reflecting on his trip to Spain


If you struggled with jet lag as much as I did, coffee will be your friend in Spain. Fortunately, there are an abundance of coffee shops and bakeries. You usually won’t have to walk more than a block in most parts of Madrid to find one.


Often times most of the coffee shops won’t have menus, but you can easily order an espresso or coffee with milk (café con leche). Unless you otherwise specify, they will likely assume that you will be drinking your coffee there. If you’d like to take your coffee with you, simply say “Quiero un café con leche para llevar, por favor.”


Another item to note is that if you plan on drinking your coffee in the store, they will not give you your bill unless you ask for it. This also applies to restaurants. You can ask for your bill by saying “La cuenta, por favor.” I had a slight embarrassing experience at a coffee shop where I was handed my coffee and I stood there for about 30 seconds with a 20 Euro bill in my hand while the staff pretended I wasn’t there. I finally took my coffee and sat down.


Another difference I noticed is that the Midwestern friendliness didn’t translate. Greetings here are often, “Hi, how are you?” Early in my trip, I would often greet the store clerks by saying “Hola, como está?” I learned that was often followed by a blank look from the employee. Sticking with just a simple “Hola” seemed to be more acceptable.


Culture differences can be awkward and difficult at first, especially if you don’t have anyone to walk you through them. Once learned though, it becomes pretty easy to fit in.

Tuesday, April 12, 2016

The Madrid Metro

Like with most of our travels, when we first arrived in Madrid we were a little intimidated with getting to our place and navigating the city's Metro/public transit system. The notes we had written down about how to get to our first destination did not quite match up with what we first encountered. But before we even boarded our first train a nice Metro worker guy handed us a map and it quickly made sense. In fact out of all the places we have traveled to, Madrid's Metro system was among the easiest to figure out.


A typical entrance to a Madrid underground Metro station


The Madrid Metro system is nice for several reasons. First, there are quite a few stations where transferring between lines is possible. And those various transfer points are spread out across Madrid instead of being all focused on one central location. This may be confusing at first, but once you get a map in hand, it makes it very handy because there are always multiple ways to get to your final destination. It's nice to have options.

Second, the trains run very frequently, at least in the more central area we were in. There is no need to memorize a schedule. If you miss a train, there will likely be a another one within 5 minutes. Related to that point is that there are no express trains as far as we know, aka trains that skip over stations. That is always such a huge pain in cities where you not only have to worry about which line to get on, but also whether or not that particular train will stop at your station. Maybe that sucks for people's who's stops are further out of the city, but it was nice for us not to worry about. 


The Madrid Metro system map ( A Handy PDF )


Getting a Metro ticket is pretty straight forward. We always used one of the automated ticketing machines. There are many language options, so we were easily able to switch it to English instructions. The machines take both cash (EURO) and credit card. With a credit card if the transaction is high enough, it may require the use of a PIN which many US credit cards don't have yet. Luckily ours worked just fine. The main two options we were interested in were single tickets or a 10 pack. We used the single ticket the first day to get out of the airport since there is an additional fee to use the airport stations and we weren't sure how that would affect our 10 pack usage. But after that we all bought a 10 pack ticket for around 12.20 each to use over the course of our week in Madrid, which made life super easy. 


The automated Metro ticket machines 


A typical Madrid Metrobus ticket.


Another nice thing about the Metro system was it didn't matter if you got lost. With a single ticket you could make as many transfers as you needed to until you finally existed a station. All the transfers areas are connected past the turnstiles. So even if we had jumped on the wrong line, it would have not been a big deal to jump on another train to take you back. (Note: We never got a chance to use a bus, so I'm not sure if the same is true for those) 

Transfers consist of getting off the train you are on, walking up and then down several flights of stairs or using an escalator, following/finding the color coordinated signs for the new line that you want, and figuring out which direction on that line you want to go; which was usually indicated by the station that was on the end of the line in that direction. The direction of the line you wanted was probably the hardest part to figure out, and even that wasn't too bad assuming you had a map.


A typical Metro underground ticketing/turnstile area


Some of the newer/fancier sliding door "turnstiles"


To use your ticket, simply insert it into the side of the turnstiles. If it is the oldschool turnstile you can walk partially or all the way through and retrieve your ticket from the other side. If it is one of the newer sliding door systems, you pull your ticket out from a slot on top of the system and the doors will open for you to talk through. All the systems have a little display to tell you how many uses you had left on your multi-use ticket.


A train at one of the few stations outside


A pretty typical underground station


And that's the Madrid Metro system. I don't know why I wanted to go into this much detail about the Madrid Metro. I was just impressed with how it worked, so I wanted to write about it. I hope someone else might find this info useful or interesting too.

Friday, November 13, 2015

How to Order Pad Thai

On our first day in Chiang Mai, Brandon and I were searching for dinner and found a place with Pad Thai. The restaurant consisted of huge woks near the sidewalk where mass orders of Pad Thai were being freshly made. Beyond the cooking area was a huge, plain warehouse filled with plastic chairs and metal tables. We didn't know what to expect, but it had a lot of Thai people in it, so we figured it would be good. 

We found out afterward from our host, Alana, that the place we happened to stumble upon was a popular Pad Thai specific place. The Thais have favorite restaurants where they go just for Pad Thai. They also have favorite market stalls for each of their favorite dishes and regularly return to these places. Without knowing it we had participated in a very Thai activity. 


The first time we went to this restaurant we did not know the usual process of ordering or paying. Since our first experience, we have returned a couple times. By people watching we have uncovered the process and finally followed the system successfully! Hurrah! 


How to order Pad Thai: 


  1. Pick a table, sit down, and note what number is painted on your table top
  2. Find a basket on the table that has a pen, mini menu, and blank sheets of paper in it
  3. Write your table number on one side of the piece of paper
  4. Read the menu and decide what you want
  5. Attempt to write out the name of the dish you want in Thai by copying the lettering on the mini menu
  6. After the name of the dish, write out the lettering for the meat you want added to the dish--chicken, pork, shrimp, squid, seafood
  7. Walk up to the wok station in the front and hand your paper to a worker
  8. Return to your table and wait for your food to arrive
  9. While you wait for your food locate the table in the back of the warehouse that has cups and straws for water and a "salad bar" . 
  10. Take however many bean sprouts, cucumbers, and green onions from the salad bar you want for free
  11. Take cups and straws back to the table and use the water pitcher on your table to fill the cups. Don't worry, the water is clean. Using the straw helps you fit in. For some reason Thais use straws in all beverages. 
  12. When your Pad Thai arrives, jazz it up Thai style by adding your salad bar toppings and the condiments on the table--sugar, chili flakes, sweet chili sauce, fish sauce
  13. Open the little box on your table to find silverware. 
  14. Use a spoon in one hand and fork in the other to eat your amazing Pad Thai (the fork is used to shovel food onto the spoon). 
  15. Finish every last bit of your delicious Pad Thai
  16. Leave your dirty dishes on the table and find the desk near the cooking station to pay
  17. The woman at the desk will have your original paper order and will have added the prices of the food up on it 
  18. Pay the amount specified, probably about 70 baht total for two meals. 
  19. Leave the restaurant and find your way home with your stomach full and wallet more full than you expected. 


Mini menu, pen, and blank sheets of paper. The big menu on the right is given to foreigners, but the last time we went out for Pad Thai we were able to order it before someone came over and gave us the big menu. 


I wrote out our order for Pad Thai with chicken (top) and plain Pad Thai (bottom) in Thai! I must have been successful, because we received what I had written down! 


The salad bar of water, bean sprouts, cucumbers, and green onions


Sugar, sweet chili sauce, red pepper flakes, and fish sauce condiments with the water pitcher hiding behind them all 


Enjoy both your success in ordering and the delicious taste of your doctored up Pad Thai! 

Friday, September 18, 2015

How to pack for a 3 month trip abroad...we think

We've had quite a few people ask us how we're going to pack for our nearly three month long trip to Hawaii, Australia, and Thailand. With packing there's always a fine line between want and need. And, of course, it's important to reduce weight as much as possible for both travel comfort and airline restrictions. After much debate we've settled on the following, and we hope we're happy with the result: 


Our climbing gear: quickdraws, route cleaning gear, chalk bag, belay device, climbing shoes (and Brandon's chucks), harnesses


We struggled to choose a bag for our climbing gear until Brandon had the ingenious idea of using our rope bag and attaching our climbing helmet to the outside. We're not bringing our rope, because it's heavy and we can buy one in Thailand. The bag is small enough that we're hoping the airline will consider it to be a free "personal item". 


Brandon's items. Row 1: bathroom bag, tooth brush, medications, travel first aid kit
Row 2: 9 socks (3 thick Smartwool, 3 sport Smartwool, 3 light & thin ), 10 boxers, 1 sweatshirt, 2 long sleeve shirts, more toiletries
Row 3: hand towel, washcloth, 2 athletic shorts, 7 shirts (1 Icebreaker wool) , hat, sunglasses, wallet
Row 4: day pack bag, 2 shorts, swimsuit, climbing pants, jeans, Keen sandals, laptop + cord


All of Brandon's items fit in this backpack!


Katie's items. Row 1: running shoes, Chacos.
Row 2: 2 bras, 3 sports bras, swimsuit, 10 pairs underwear, 4 pairs socks, dirty laundry bag, ubiquitous blind date scarf.
Row 3: 6 t-shirts, 3 sleeveless shirts, 2 climbing pants, 2 running shorts, 2 workout shirts, 1 Icebreaker wool dress, 1 undress
Row 4: lock, diva cup, toiletries, spare glasses, 2 life straws
Row 5: 2 pairs of shorts, 1 pair jeans, 1 pullover, 1 sweatshirt, 1 raincoat, 1 multi-use headband
Left side: large empty duffel/backpack for re-distributing items as needed for weight-based flights


All of Katie's items including the empty bag fit in here! 


Day pack: water bottle, plug adapters, headlamps, wallet, passports, international drivers license, phone, power cords, toilet paper, rain poncho


Everything we think we need for about three months of travel! 

Wednesday, August 12, 2015

How to do a UP rock climbing trip

In July, Brandon and I were in the UP for a week to spend time with family at Gitche Gumee Bible Camp. Brandon had heard of some rock climbing in the Keweenaw Peninsula near the camp and had even tried to find it once without success. I, of course, was intrigued and we decided to re-explore the area. 

With a little online research, I quickly found that UP climbing is not well documented at all. Thankfully, I also discovered that Down Wind Sports in Houghton had unofficial UP climbing information available at the store. Before we ventured deeper into the Keweenaw we stopped in. The guys working there were enthusiastic and helpful. They told us about some new sport climbing at Silver Mountain in Baraga and were able to print us some instructions. Baraga is not in the Keweenaw, but it was on the way home if we wanted to check it out. We also secured a more descriptive PDF of the climbing on Cliff Drive in the Keweenaw that Brandon had previously tried to find. We were warned that Cliff Drive was more adventure-type climbing that was poorly marked and required top belaying. But, armed with the paper copies and PDF we felt confident and excited about our climbing prospects. 

Before checking out these climbing areas we stumbled across some unofficial climbing at Devil's Washtub near Copper Harbor. This is an awesome roadside cliff jumping area complete with a tunnel to swim through after the jump. The tunnel rock also looked prime for bouldering, so Brandon and I had to try it out. I even had some old climbing shoes that I didn't mind subjecting to the water. Climbing over water is fun! If you fall off, you don't have to worry about hard ground beneath...you just get a splash! 

Brandon climbing the inside edge of the tunnel

Working on a similar section

Brandon eventually defeated this boulder and climbed all the way over the top! 

Climbing the outside portion of the tunnel

After our spontaneous bouldering at Devil's Washtub we went to Cliff Drive to scope out climbing for the next day. We were not successful. Our excitement about the PDF instructions quickly turned to disappointment. We managed to follow the first few directions (we think), but it became hazy quickly with instructions to follow seasonal stream beds (there were multiple) or climb over boulders (once again, multiple). Definitely not like the Red River Gorge in Kentucky where we're used to mapped out directions, labeled routes, and many fellow climbers. This place was deserted other than a bunch of metal detecting junkies searching for treasure among old mining pilings.  

But we didn't give up. The next day we went back and decided to just forge our way through the brush and rubble up to the top of the cliff. We did and managed to intersect with what looked like some legitimate trails. We still had no idea where the climbing routes noted in the PDF were. The area was, as we were warned, more setup for adventure climbing where you just make up what you want and hope it works out. So, we got into the adventure climbing spirit, built our own anchor (three actually, due to my nervous insistence), belayed one us down from the top (me first), and hoped that we could climb back up. Needless to say finding a good spot was among the more difficult tasks. But we did it and had a lot of fun along the way. 

Beautiful view from the top of the cliff where we could also see our car parked on Cliff Drive. We climbed a few feet north of that pine tree on the arete. 

Brandon looking over the edge of the cliff trying to see if this is a good place for us to climb

Preparing for a climb. You can somewhat see our set-up.

If you're interested in our set-up, we had three anchors at the top. We chose this location because it looked promising and because we found a sport climb bolt there. Our anchors were the base of an old tree, a thick root, and the sport climb bolt. We had brought webbing along which we ran through our anchors and into locking carabiners we usually use for cleaning sport routes. Our rope then went through the locking carabiners between the belayer and climber. The belayer was clipped into the sport bolt with a clip and several slings we looped together. We did not want to chance the belayer falling if the climber took an large unexpected fall. It took a while to set up, but feeling safe makes for more fun climbing in my opinion. We should probably try to live to tell our rock climbing stories. 

We then lowered the climber over the edge. Because we were not able to fully view the rock face before the climb, we lowered slowly. The climber viewed the rock face and determined if it was within our skill level. If it was, we lowered more. If it was questionable, we did a small trial climb up that section and then re-lowered when the trial was successful. We ended up climbing three routes that we made up, a 45 foot arete, 50 foot slab, and 80 foot chimney. We were able to stay in one location at the top by making minimal adjustments to rope position as needed. 

When we were done we carefully cleaned up all our gear and re-traced our steps down the steep, cliff-side "trail" without injury, feeling adventurous and accomplished.

-----------------------------------------------------------------------------------------

When camp was done for the week, we drove to Baraga to check out the sport climbing at Silver Mountain. I have to admit that I was sleep-deprived, irritable, and not enthused about this adventure, but Brandon soldiered forward and eventually turned my attitude around as he is so cunningly able to do. 

Amusingly, I had been to Silver Mountain at least three times before on a UP trip I took annually with some physical therapy friends when I was in grad school. I had no idea there was rock climbing there, but I also wasn't a climber at the time. Our drive to Silver Mountain was nostalgic for me. The nearby roads, parking area, and mountain were familiarly empty of people. Now, instead of hiking up the mountain I would climb it. 

As aforementioned, we had some printouts detailing the Silver Mountain climbing area. We quickly found some well-worn trails to the left that made it to the base of the mountain and some sport bolts. The issue was now determining the grade of the sport routes, so we could choose an appropriate one to climb. The information we had was outdated as several additional sport routes seemed to have been added to the area. This was more exciting than frustrating, because additional sport climbing routes meant more potential for us to tap, and we were now used to the lack of information surrounding UP rock climbing. 

The basalt cliffs of Silver Mountain have beautiful rainbow roofs


We eventually settled on a sport route that was not listed, but looked very do-able and about 60 feet tall. I led the route easily with no falls or takes. Brandon then followed suit and cleaned the route as well. We rated it a 5.7 or 5.8-, so it was a good warm-up for us. 

Leading what we guessed was a 5.7 or 5.8-

We then explored further to the left on the cliff and climbed what we determined after to be a 100 foot route called Between a Block and a Hard Place and rated 5.10b. Brandon led it admirably with a few challenges along the way. I then top roped it with some beta from him through a particularly challenging part where the minimal hand holds required reliance on the feet and slab. 


Me near the top of Between a Block and a Hard Place

In the end, we were quite proud of ourselves for having correctly judged the difficulty and successfully climbed the routes we chose. It was definitely a place we want to return to explore more sport climbing. 

Kentucky is definitely better established climbing and a lesser drive at 7 hours rather than the 10 hours to the UP. But, if you're in the area, the beautiful solitude and adventurousness of UP climbing is not to be missed! 

Wednesday, August 5, 2015

Health Insurance

Health insurance is a rather mundane topic, but it is important to planning a sabbatical. And, after much confusion, consultation, and deliberation, I am happy to say that we do have insurance. If you're bored already, I wouldn't recommend continuing to read. Just stop now. You can be happy for us that we have insurance and move on to more fun pursuits. I'm just going to go over the dull details below. You've been warned. 

We have been blessed in receiving awesome health care coverage thru Brandon's workplace. Thankfully we were able to retain that coverage thru July 31 by using up Brandon's PTO and taking advantage of a company policy that provides insurance for the full month as long as you've worked at least one day of that month (thank you PTO). 

After July 31, we would receive a COBRA notice and be able to take that as our insurance. But, here's where your company providing awesome insurance is a double-edged sword. Awesome coverage = huge cost. And, that huge cost we would now be solely responsible for. So, taking COBRA was not going to fit into our sabbatical budget and we needed to look into other options. 

Many people have asked us whether we will find coverage in the Health Insurance Marketplace thru Obamacare and the Affordable Care Act. Well, we looked into that and we are not eligible. We do not fall under a Qualifying Life Event to get insurance immediately following July 31 because we are eligible for COBRA. So, we would have to wait for Open Enrollment on November 1 and take the expensive COBRA in the meantime. Not a good option for us. 

So, we scoured the internet and read some blogs for other healthcare options. In doing so, we discovered some expat plans. These seemed valuable on the outset with our mixture of international and domestic travel for the year. However, we discovered the stateside coverage was not very good, and the plan did not fall under the Affordable Care Act requirements resulting in a fine. It did not seem wise to have to pay both an insurance premium and the fine. 

We were back to square one with seemingly millions of private insurance options to sift through. A coworker of mine suggested talking to a local insurance agent, which turned out to be immensely helpful. The agent helped us quickly navigate the options. Together we determined that the cheapest course of action was to purchase a private domestic insurance plan approved by the Affordable Care Act and a separate international travel insurance plan. 

First, we had to decide if we wanted a HMO or PPO plan. A PPO plan was better for us since we would be traveling all over the country throughout the year and finding doctors within a limiting HMO network could be a problem.  
Then, we had to decide what we wanted to pay for premiums versus deductibles. That was easy. We are young (at least I am...Brandon has crept on to 30 now!) and healthy. We wanted the cheapest premiums (though this usually means a high deductible), which resulted in a HSA. 
Finally, for insurance carriers, the main choices were Blue Cross Blue Shield (BCBS) or Priority Health. We preferred BCBS because its national recognition would streamline the paperwork behind any care we would need in our travels throughout the country, whereas Priority Health is more West Michigan based and lesser known. 
We were pleased to discover that BCBS' HSA was cheaper than Priority Health's. Decision made. As of August 1, we now have a BCBS HSA! 

It was all a very excruciatingly adult experience. If you're bored by now, I'm not surprised. I also have no sympathy. I warned you! 

After all that you may ask, why didn't you just go without insurance and pay the fine? You are young and healthy, aren't you? Well, yes, but we are also very active with rock climbing, snowboarding, trampolining, cliff jumping, and who knows what other wild pursuits, and we (aka I) are accident prone with coffee tables (they just jump right out in front of me... seriously). Insurance is...well, insurance against the unknowns in life. We don't want to stop our sabbatical early and drown in healthcare debt. 

These activities are also why we will invest in some travel insurance. This insurance is bare bones providing assistance and coverage of just emergency medical expenses, emergency medical evacuation, repatriation of remains, or accidental death and dismemberment. These are not at all common occurrences, so the plans are super cheap...we're talking like only three to four dollars per day per person. God forbid we would actually need to use the insurance, but if we did, those few dollars a day would save us hundreds of thousands of dollars. 
We haven't purchased travel insurance yet, but it seems fairly easy. We can buy it right before we go abroad, make sure it covers the sports we want to do, and pay only for the days that we are traveling internationally. There are a bunch of companies to choose from, and when we decide on one we'll let you know. 

So, if you're not sleeping yet, those are the logistics of our health insurance plan. Now back to the fun parts of taking a sabbatical!